
Tracking time is an effective way to keep your project on schedule and to know how much time your team members are spending on tasks. Brightpod has both a built-in time tracking system and an integration with Harvest.
- Set a time budget for a pod
- Track time manually or automatically using Brightpod
- Know how much time you’ve spent on a pod
- Use Insights to track time by team member
- Track time using Harvest
Set a time budget for a pod
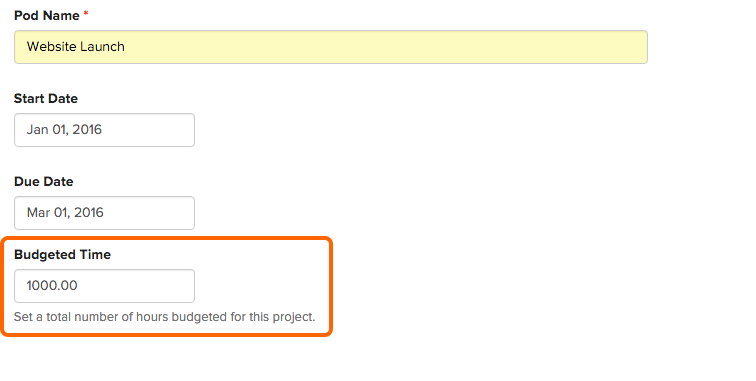
When creating a new pod, you can set a budgeted time when setting up your pod for the first time.
Or, if you have an existing pod:
1. Go to the pod you want to add a budgeted time to.
2. Go to Pod settings.
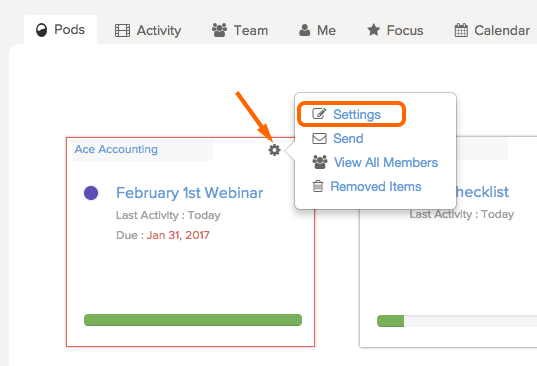
Here you can add budgeted time. Remember to click Update pod.
Now that you have added a time budget, go to your Time page.

It will include an indicator on the right to show how close you are to reaching your budget.
![]()
Track time using Brightpod
Time tracked on a pod is is entered manually or tracked using a timer by each team member. It will contribute to the overall time budgeted on a pod, towards the time spent on a client (if there is a client associated to the pod), and how much time each team member has recorded.
Tip: Clients are able to see tracked time on tasks within task lists that are marked as visible to clients. They cannot use the automatic timer.
You can record time as billable or non-billable. This is useful if you are exporting time reports by team member to pay them for time worked.
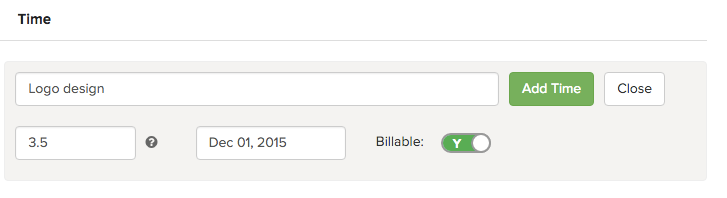
When manually adding time. you will enter the description, the hours you spent, a date, and whether it is billable or not. Time tracked manually does not have to be associated to a task, but must be associated to a pod.
Tip: Time can be recorded in minutes (8m), hours (8), or days (8d). Hover over the question mark in the application to see examples.
When using the automatic timer, time is recorded automatically for a task and pod. At any time, you can pause or submit your time from the clock at the top of the page. After clicking Submit Time, review your entry, make any changes, and submit your time.

Learn more about tracking time using the automatic timer.
You can track time manually or with an automatic timer from three locations: the global + option, in task details, or on a pod’s Time page.
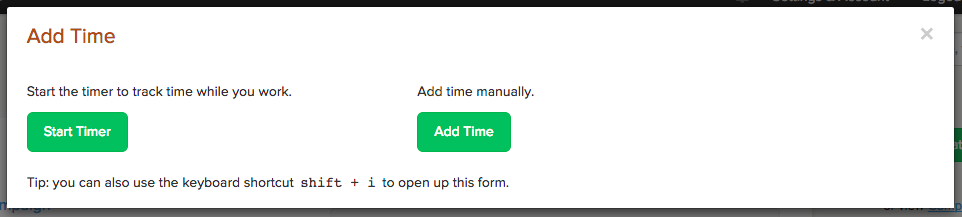
From the global + option,
1. Click the + icon and select Time.
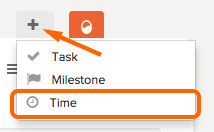
2. Choose Start Timer (automatic timer) or Add Time (manually enter your time.)
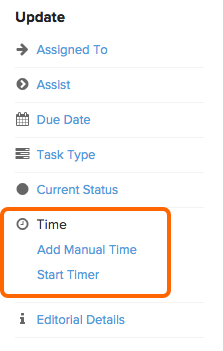
From task details,
1. While working on a task, click the task to open task details.
2. On the right side, click Add Manual Time or Start Timer.
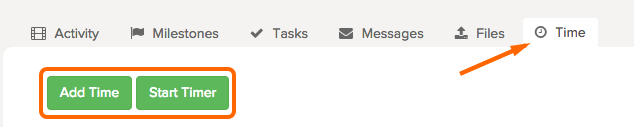
From the time page of a pod,
1. Go to the Pod you want to record time for and click Time to go to the Time page.
2. Click Add Time or Start Timer.
On your Time page, you will see all time entries that have been entered on tasks and the time page. Here, you can hover over your entries to edit or remove them.

Know how much time you’ve spent on a pod
You can use both the Time page and the Insights page to gather information about tracked time in your Brightpod account.
Using the Time page for information
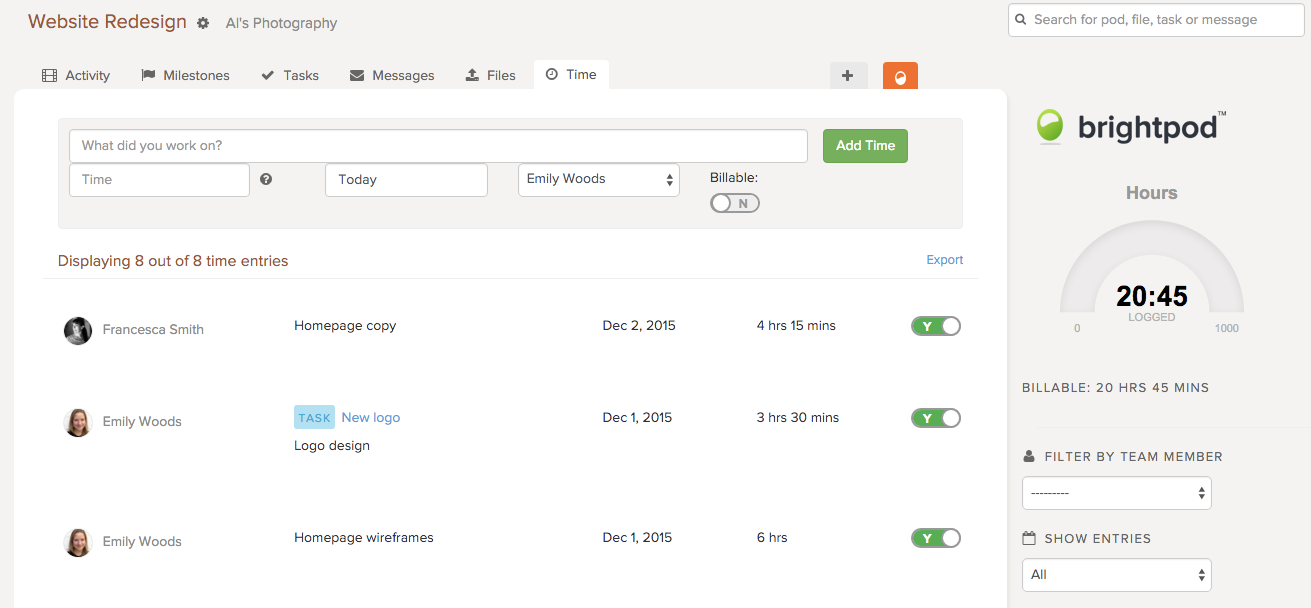
The Time page shows all tracked time on tasks within a Pod. Here, you can enter time separate from a task.
On the right hand side, you can see how many hours are tracked in total against your pod’s budget.
![]()
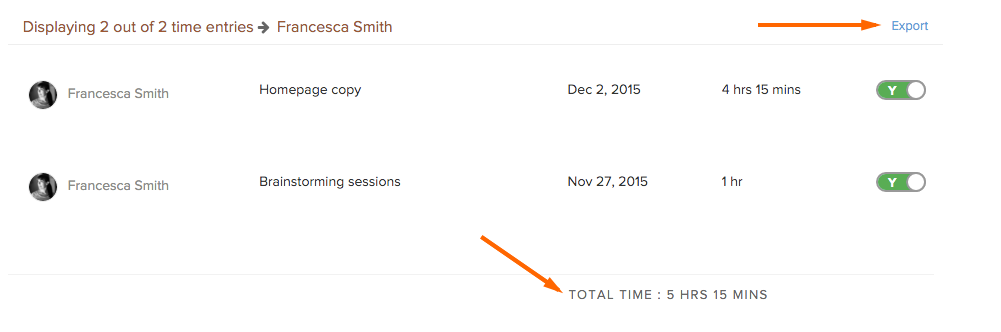
There is also the amount of billable time, and filters by team member and date. 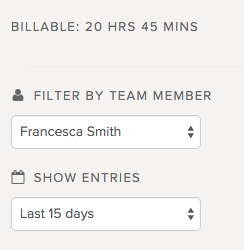
If you filter by a team member, you can see their total hours at the bottom. Export this report by clicking Export.
Using Insights for information.
Insights gives a lot of information, but you can narrow your search to a specific pod and time.
1. Go to Insights.

2. On the right side, use the filters to select your pod, date range, and uncheck milestones and tasks so that only time is checked.
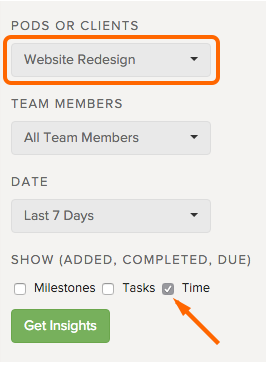
3. Click Get Insights.
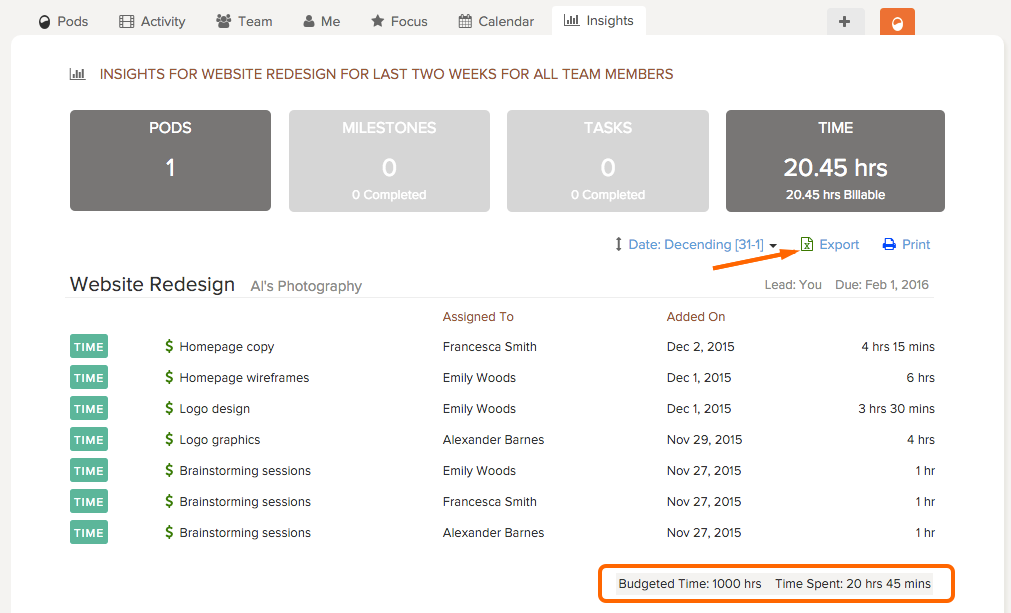
There are all of the time entries, the total time spent, budgeted time, and options to export to CSV or print to PDF.
Use Insights to track time by team member
Filters in Insights can be an easy way to get information and reports on your team member’s tracked time.
1. Go to Insights.
2. On the right side, select the team member’s name under Team Member.
3. Uncheck milestones and tasks, leaving only time checked. Tip: You can also filter by pod, client, and date.
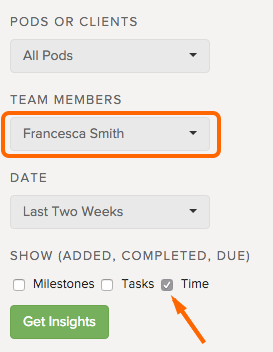
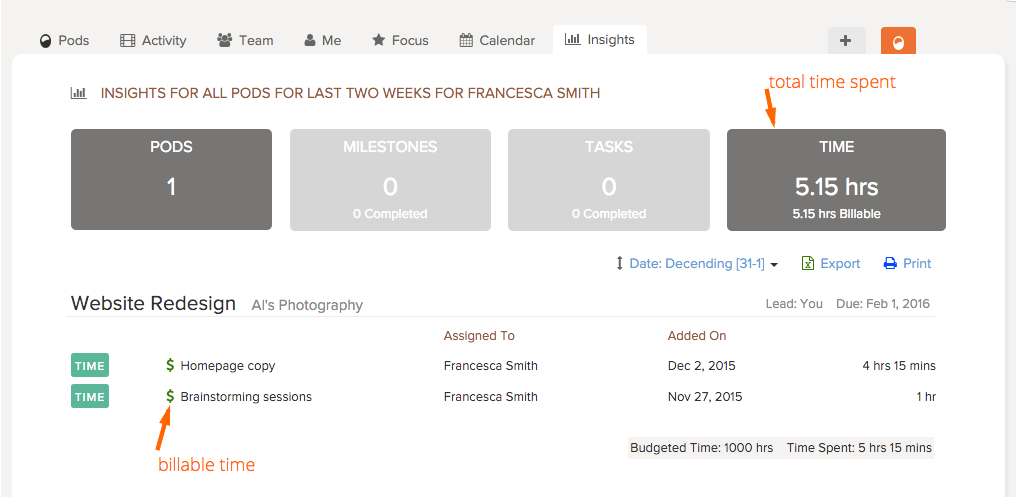
4. Click Get Insights.
This report will show total time spent, which tasks have time tracked and how much time per task, how many pods have tracked time by this person, which hours are billable, and the date the time was added.
Track time using Harvest
If you have a Harvest account and want to continue using it to track time in Brightpod, you can use the Harvest integration.
- You cannot use both Brightpod Time and Harvest at the same time. You must choose one or the other.
- Once Harvest is enabled, all Brightpod Time features are disabled for all pods.
- Time tracked on a Task will appear in your Harvest account.
- Time tracked in Harvest will not appear in Brightpod.
- If you have time already tracked in Brightpod on historical Pods, that information will not be lost if you enable Harvest. It will be hidden as long as Harvest is enabled. You can access it by re-enabling Brightpod Time.
Enable Harvest
1. Log in to your Harvest account in another window.
2. Go to Settings & Account.
3. On the right side, click Enable or Disable Features.
4. Click Switch to Harvest Time Tracking.
![]()
Now that Harvest is enabled, you can start tracking Time on a Task.
Tracking Time Using a Timer on a Task
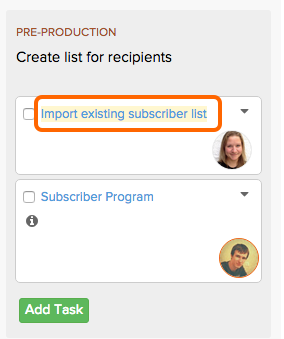
1. Go to the Pod and Task you want to start working on.
![]()
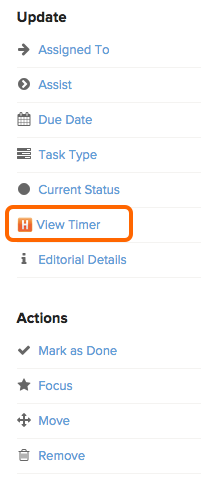
2. Select the Task name to open up the Task details.
3. On the right side, click Add Time to Harvest.
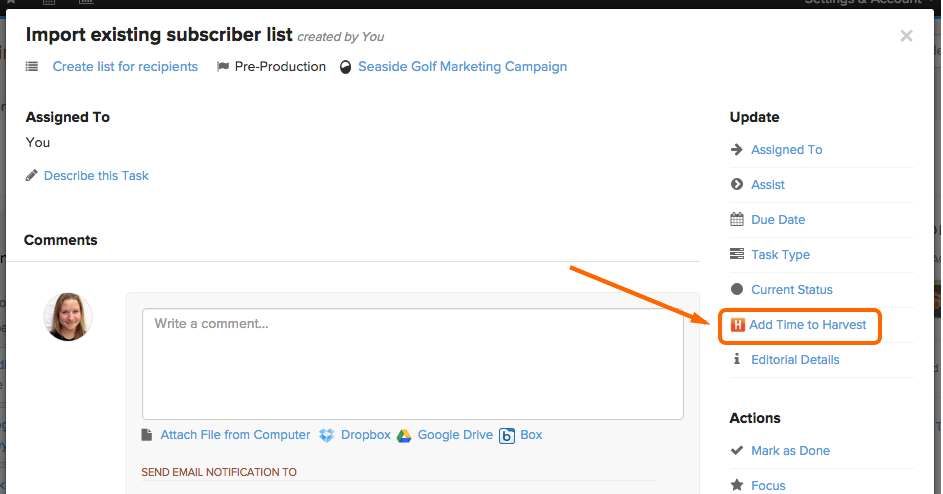
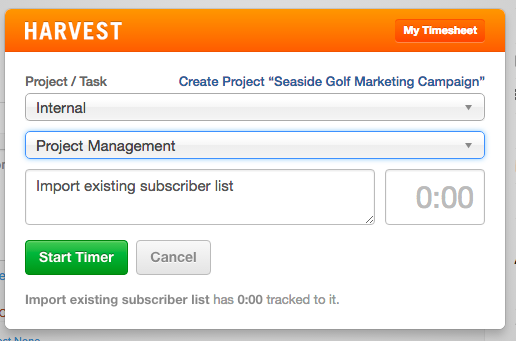
4. Fill out the information Harvest requires for the tracked time. Click Start Timer.
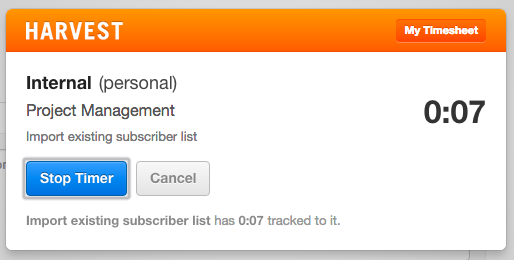
Now you are tracking time for that Task. As you are working on the Task, you can view your running timer. Click View Timer.
 To stop the timer, click Stop timer.
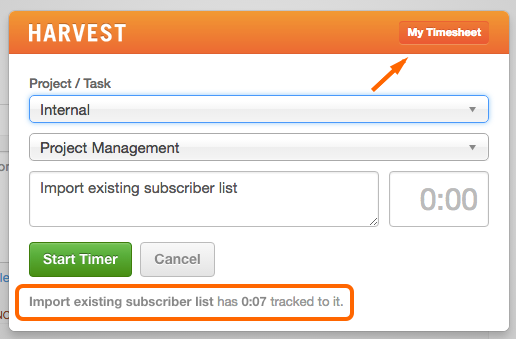
Once you have stopped the timer, you can see the tracked time at the bottom of the Harvest window. Or, click My Timesheet to be directed to the time in Harvest.
Entering Time Manually on a Task
To manually enter time already completed for a task:
1. Go to the Pod and Task you want to start working on.
![]()
2. Select the Task name to open up the Task details.
3. On the right side, click Add Time to Harvest.
4. Fill out the information Harvest requires for the tracked time. Then, in the 0.00 time section, enter the amount of time you have already completed for the task.
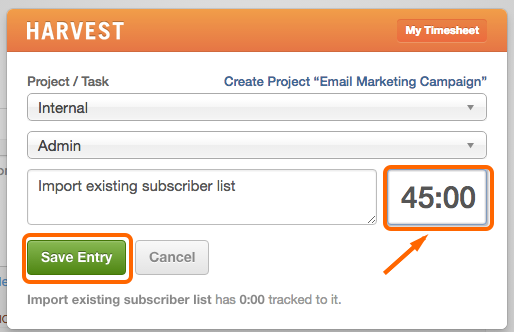
5. Click Save Entry.
Time tracking is included in Studio, Agency, and Agency Plus plans.