
Setting up Brightpod pods for a retainer client often depends on how detailed and large the tasks and projects are for your clients. In this guide, we will walk through:
- Using the client label.
- Three common retainer client cases, including one that shows the setup of time-saving workflows.
- Using the calendar and insights to keep on top of your client’s tasks and projects and see progress.
The most common cases for retainer clients are:
- Simple tasks or single task lists that repeat themselves.
- The same project that repeats itself and can be re-used as a workflow.
- Unique projects on their own separate timelines.
Using the client label
Using the client label allows you to group your pods by client without having to invite them to participate (unless you want them to be directly invited!) in your pod.
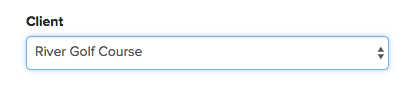
1. When creating a blank pod or from a workflow, under Budgeted Time, click the Client dropdown.
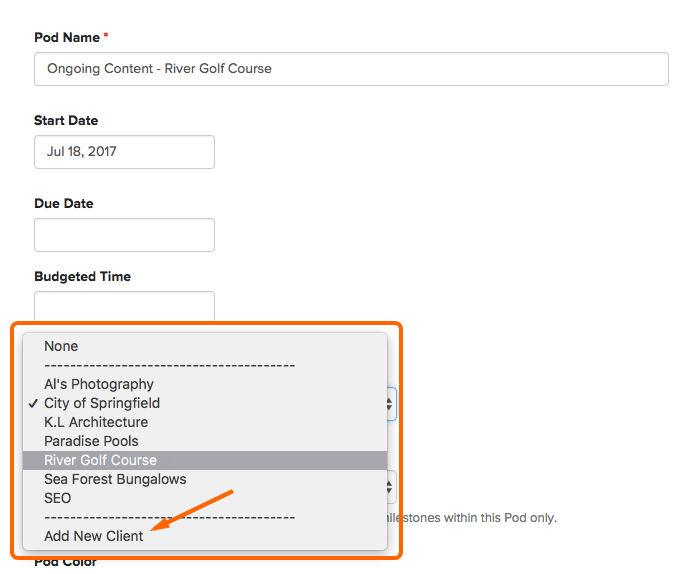
2. Choose from an existing client or select to create a new client.
3. On the Pods page, all pods with a client will be labelled.
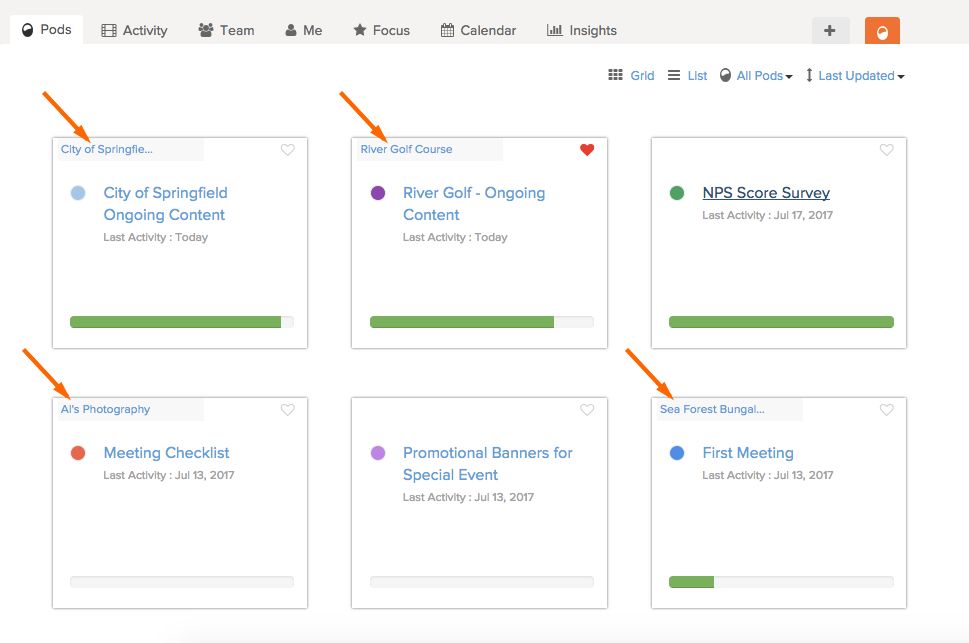
4. Click the client name to filter the pods page by client.
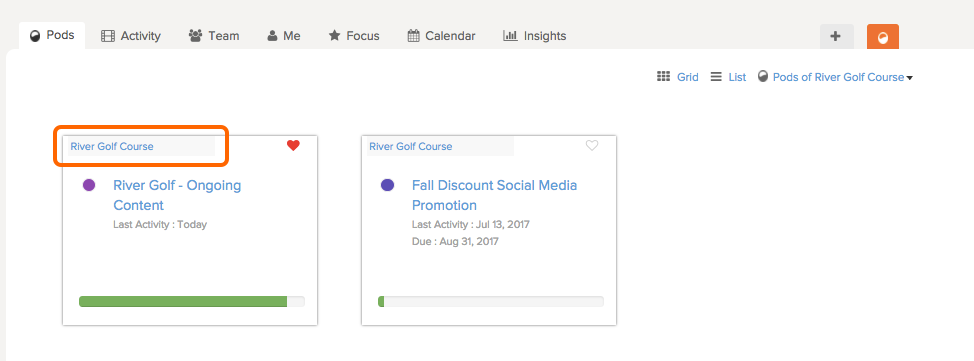
Tip: To remove this client filter, click ‘Pods of …’ in the top right and select all pods.
Clients with repeating, simple tasks
If you have many small tasks, or some tasks that only require one task list, a common way to set up your pod is to create an Ongoing Pod for your client.
This pod will have all of your ongoing daily, weekly, monthly etc. tasks that can be grouped. In the example below, there is a one-off client meeting coming up that has its own task list, ongoing blog content and tasks, and ongoing social media responsibilities.
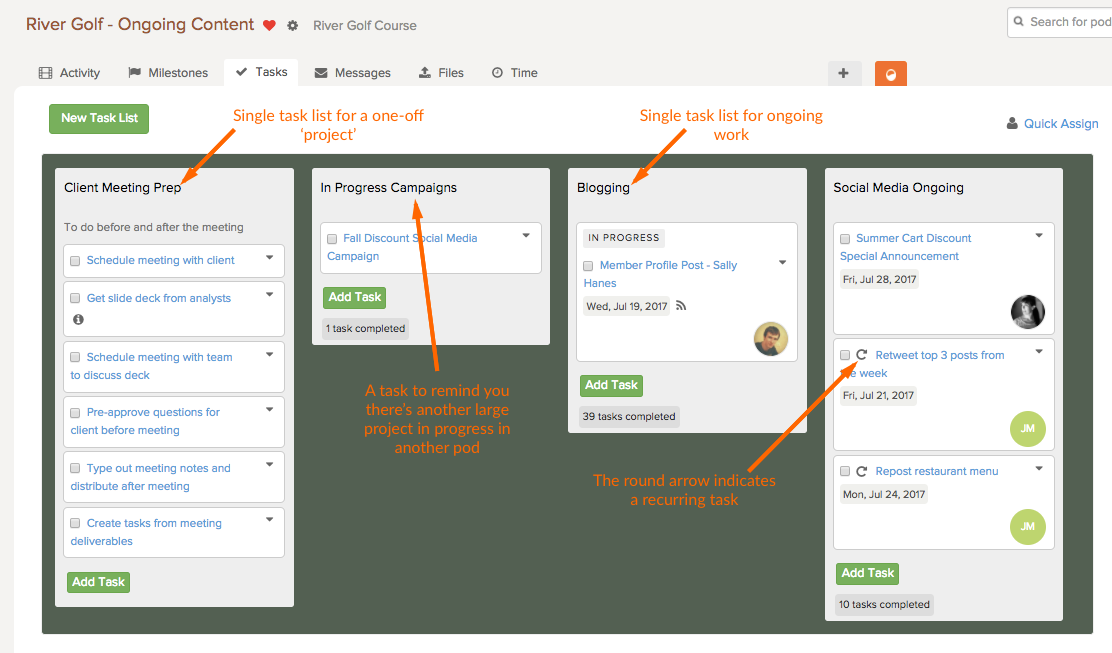
Tips on managing ongoing pods
- Keep track of all completed tasks in the completed tasks section at the bottom of each task list.
- Create recurring tasks so you don’t have to keep creating them each day/week/month.
- When finished with a task list, you can remove it and it will stay in your pod’s archive. Or, copy the task list to the same pod to create it again with all of the same tasks.
Clients with repeating projects
A retainer client may have the same project repeated over and over again throughout the year. First, you create the pod, then you are able to save the content (milestones, task lists, tasks, and team members) of the pod as a workflow and re-use it over and over again.
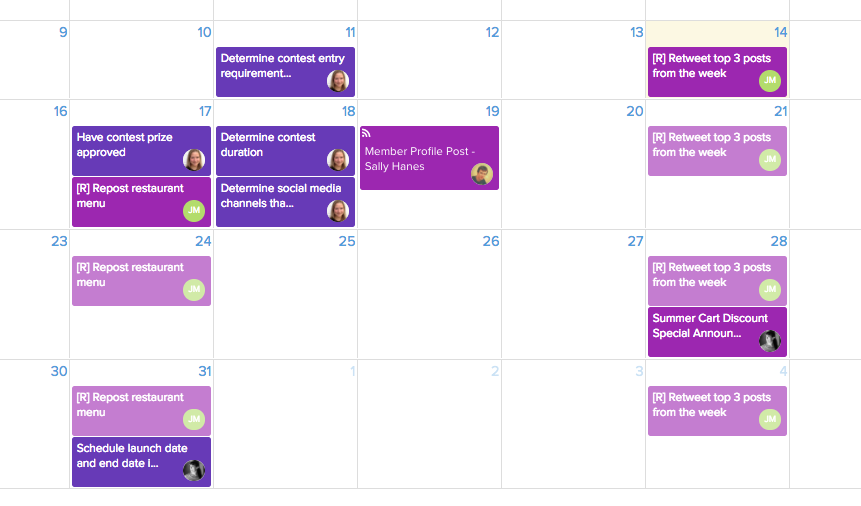
Let’s say you do seasonal discount promotions across social media channels for a client. Your pod would include general tasks around creating graphics/assets and scheduling launch and end dates. It would also include the tasks required for each social media channel.
In the example below, you can see that these tasks are outlined in task lists, then grouped under milestones. General tasks are grouped under ‘Before contest’, ‘During contest’ and ‘After contest’. Twitter tasks, Facebook tasks, or other media channels can also be grouped. Using milestones helps group these larger projects into one without creating separate pods.
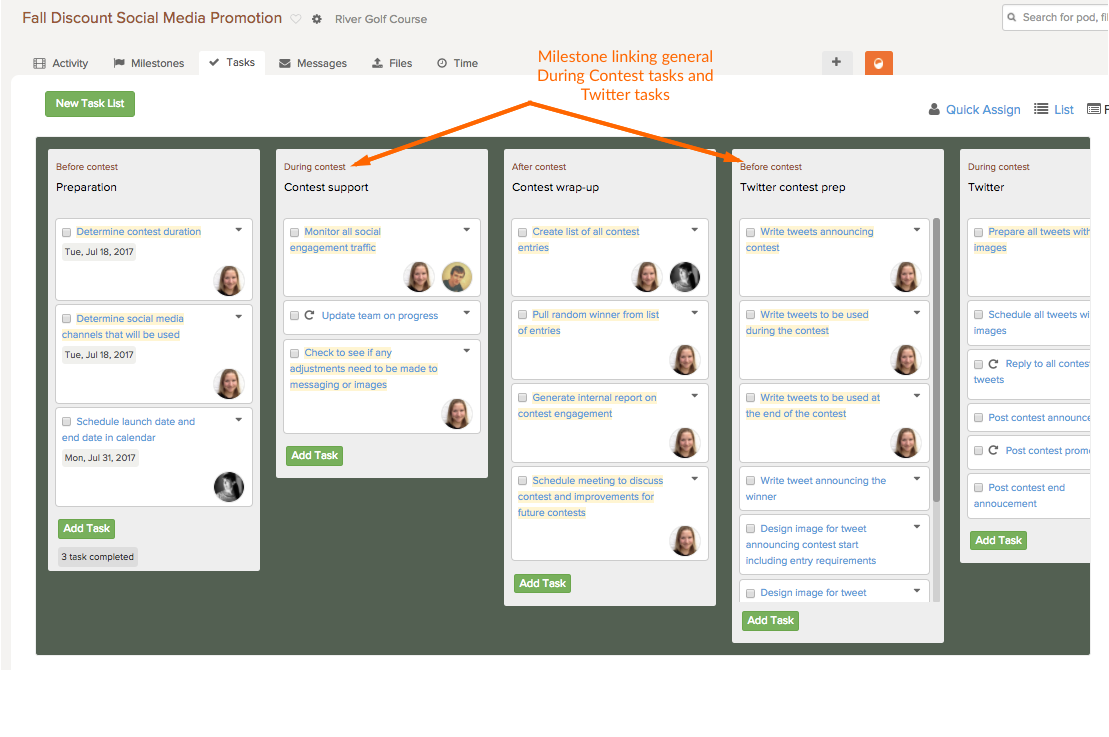
You can choose to set up your pod immediately, or as you go along.
What is important is that by the time you complete the pod, it has everything that you needed with milestones, task lists, tasks, and team members.
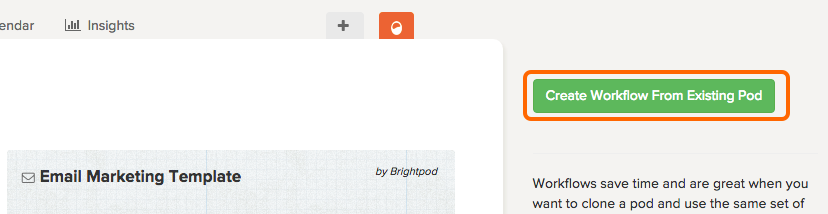
To save your pod as a workflow,
1. Click the orange pod and select New Pod.

2. Click Create a Pod from a Workflow.
3. On the right hand side, click the button Create Workflow from Existing Pod.
4. Select your current pod since it’s the one you want to save. Enter in a general name for the pod so you can use it for other retainer clients.
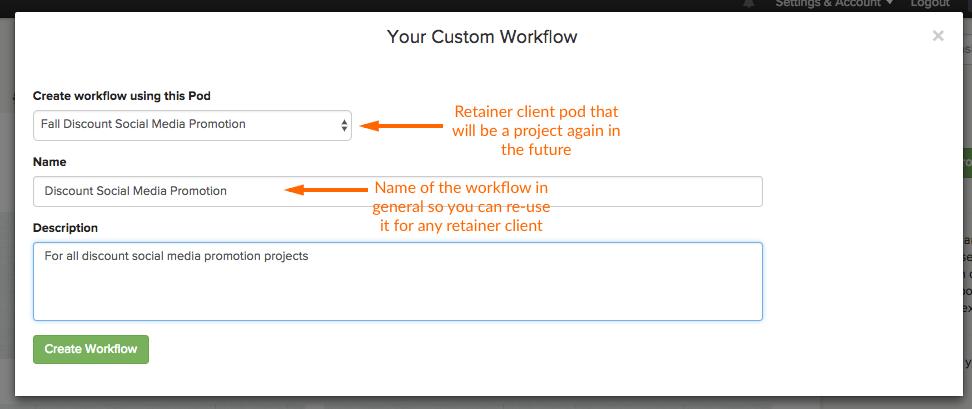
5. Click Create Workflow.
The next time your client requires this pod, it is now saved under workflows. You apply the workflow to a pod and all of the milestones, task lists, tasks, and team members will be automatically created.
6. Select the orange pod and click Workflows.

7. Scroll down and click Apply Workflow.
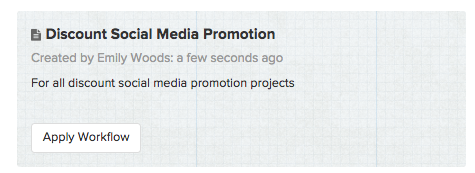
Enter in the details of the new pod, create it, and start assigning tasks!
Clients with unique projects
If your client has small projects, you can create a single task list under an Ongoing pod. For example, if you need to update the newsletter template graphics.
If your client has large projects, try to re-use workflows as much as possible to create new pods. Or, create blank pods and start from scratch.
Tip: It is not recommended to try to fit large projects inside an ongoing pod with the use of milestones. It can make your pod very large, difficult to navigate, and also difficult to separate visually on the calendar and on insights.
Using the calendar and insights
The calendar and insights are both pages that give you an oversight of what is happening for your client across all pods (ongoing, large, or unique.)
Calendar
1. On the right side, click Filter by Client and choose the client you want to see.
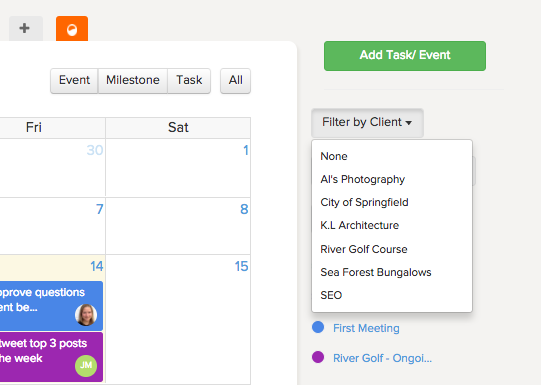
2. You will then see the different pods for your client, all tasks that have due dates, and be able to hove over the task or click it for more information.
*Tip: Any tasks that have [R] and are colored slightly lighter are recurring tasks. You need to complete the first task, then the next task will become available to click.
Insights.
1. On the right side, click All Pods and select your client under Clients.
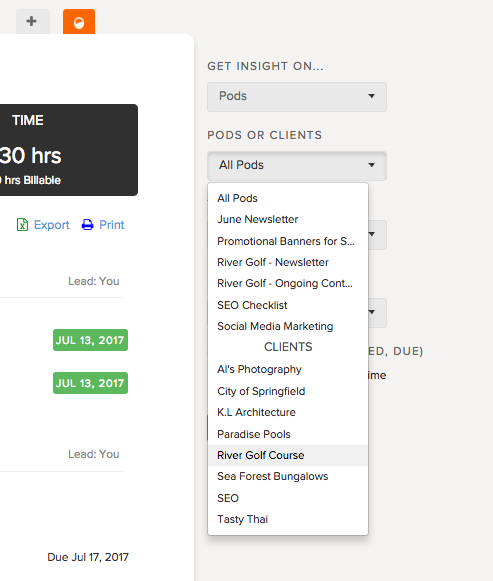
2. Click Get Pod Insights.
You can see all progress, which tasks have been completed or haven’t yet been assigned, and even completed pods.
If you have a particular case or retainer client that you need help with, please get in touch with the Brightpod Support Team! We’ll help give you as much guidance as possible with help setting up your pod.
Alternatively, when getting started with Brightpod, check out our Agency Plus plan. We will dedicate one of our support specialists to help you onboard and get started as quickly as possible.